|
|
|
|
|
|
|
|
|
|
|
|
City and Guilds: Fashion
Part 2: 7923
C+G Diploma
Suit inspired by WWII Fashions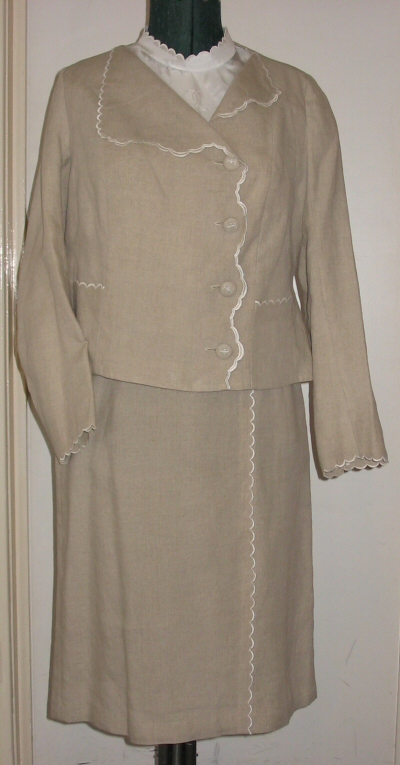 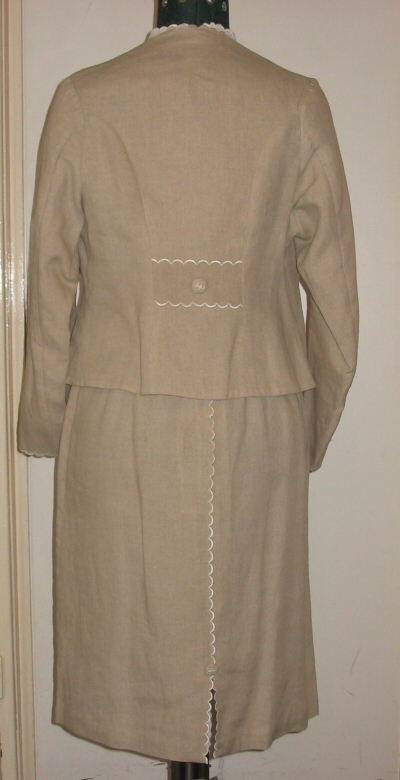 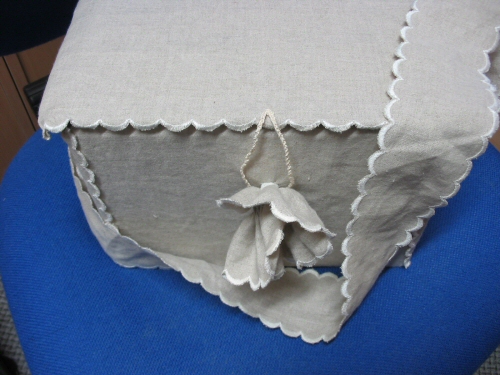
The story behind this suit involves the
concepts prevalent in WWII of "make do and mend". I imagined a lady
needing a wedding suit was inspired to use table linens with scalloped
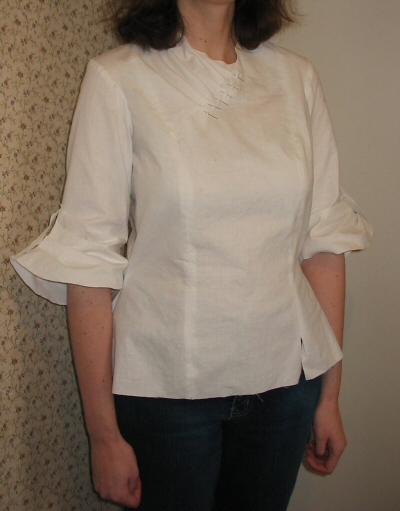
edge embroidery. The blouse is made from paj silk, as if a source of parachute silk had been available to our seamstress. It also has scallop edges. the blouse is in two parts... the actual blouse has a jewel collar which would be suitable for wear in an office, but there is also a blousette sort of panel, with a high collar, which can be worn over the other blouse to change the look, or under the suit on it's own as a false blouse. To present the paperwork and patterns that go with the blouse, I made a covered "gas mask box" which could be used as a handbag to go with the suit, as this was sometimes done in that era. |
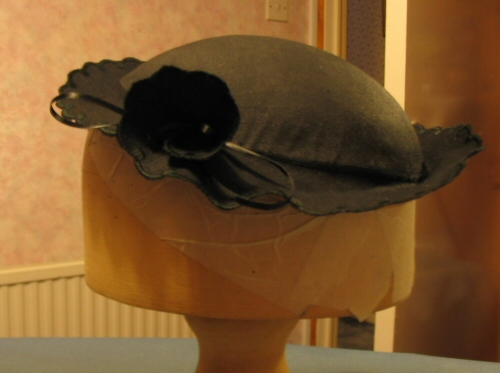 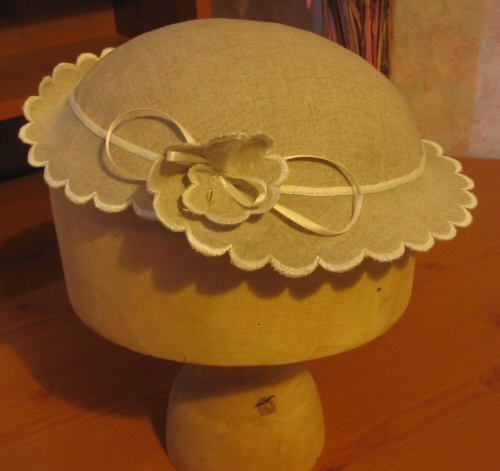 Accessory - I was required to make an accessory for one of my garments. I could have made an hand bag, but I like a challenge! I have been interested in hat making for sometime, and decided to "have a go"! Hat to go with suit. Black linen hat is the toile, but can be worn. Final hat is made from leftover fabrics from the suit. It was developed on the hat stand. It uses only one layer of fabric and is stiffened with fabric stiffener and starch in keeping with the principles of homemade hats in WWII. Once again, I made scalloped edges for the brim. The hat can be worn on perched sideways on the head for a jauntier look if desired. |
|
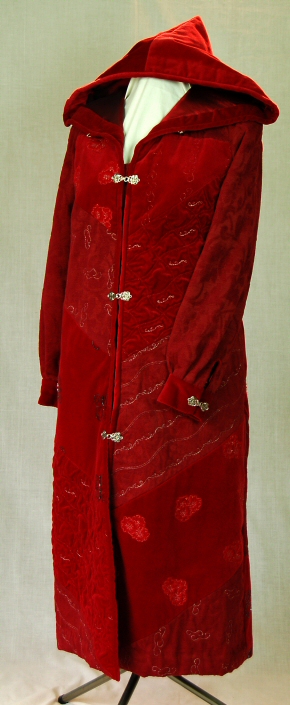
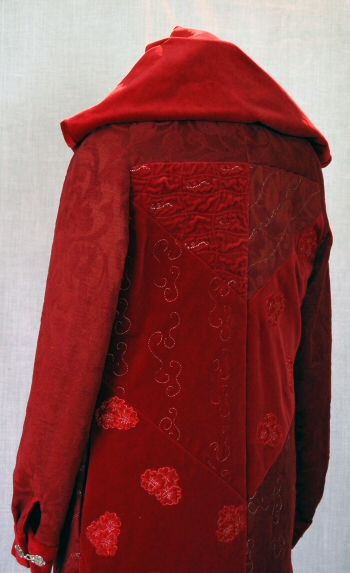
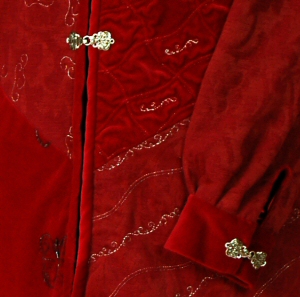
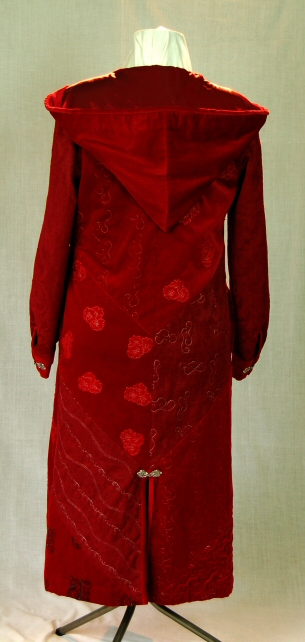
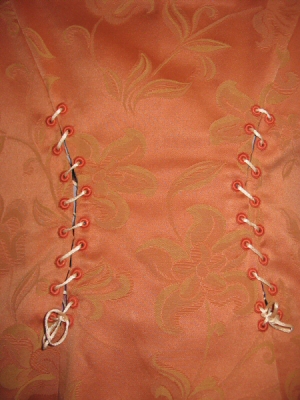
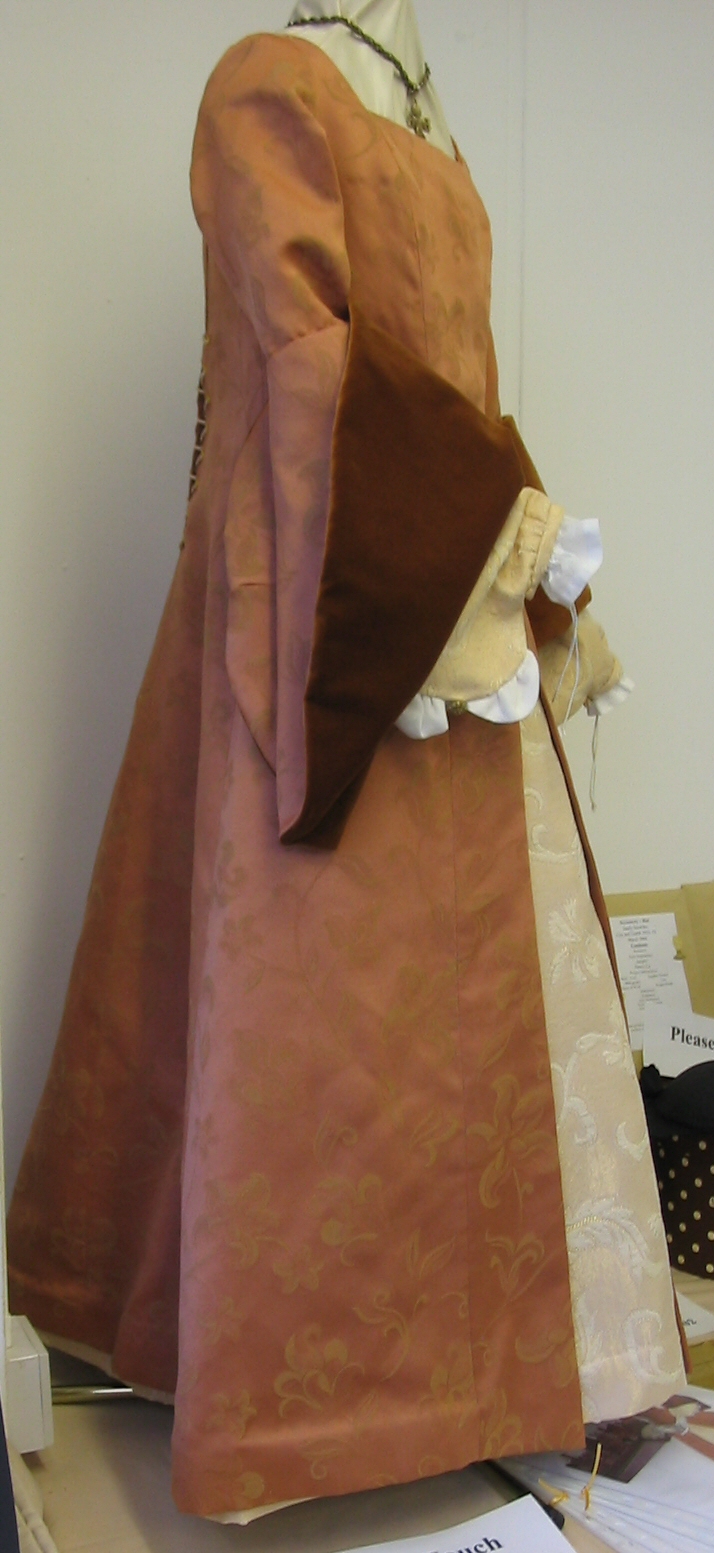
Outer Wear- Coat - Long deep red winter coat in cotton velvet and brocade inspired by Tudor fashion...embellishment, styles, and mixtures of fabrics and textures. I explored ways of creating texture on rich fabrics and combining them in a garment. Also asking, "Do red and silver work together?" advanced styling and texture
Description: Deep velvet hood, Brocade
sleeves with extended yoke, gathered into cuffs, Shot twill lining with
domette interlining, Blocks of embellished texture, front opening with
"storm flap", bound edges and silver clasps . Embellished texture
includes Free Machine Embroidery and machine patterns using silver
thread; stamped and beaded motifs, shrink-texturing; and raw-edge
appliquéd synthetic organza. Made To Wear Fashion Show, A Quilter's Gathering 2006, Nashua, New Hampshire, USA |
Other Projects: For Part 2 also had to have a folder of specific advanced procedures to show your skill. These included: -Decorative Techniques -Advanced Fabric Samples and Their Uses -Advanced Garment Processes -Advanced Pattern Cutting We also were required to research 20th Century Fashion and approximately 10- 20th Century Designers. These included notes and visuals. Another project which stretched my skills was the non-standard pattern. I had to develop a pattern for someone who is not an average shape (who is?!) but especially, with different fitting problems to mine. I developed a blouse design for my friend who is very tall, and has some of the fitting issues that go with that. The block was developed first, and then a designed pattern from the block. This is the toile.
Design for Craft - one of the most exciting projects we had to do was to develop a folder of design research. Using a topic of interest to you, you investigated various aspects of design principles. Photos and artefacts would be used to inspire ideas, which were then developed further, Concepts were explored of how these designs could be used specifically in your craft, as well as in others. If you know me, you will realise I love this type of work, and thoroughly enjoyed it! And if you haven't guessed, you will realise my topic was Tudor Fashion. I have already begun to use the ideas discovered in a number of my creations. |
|
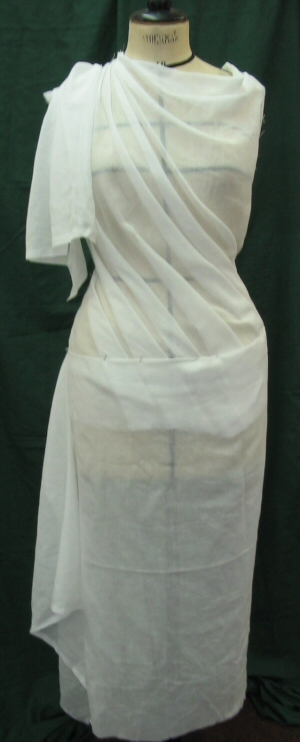
Modelling on a Stand - I had to explore the characteristics of several different weights of fabrics by developing designs directly on the stand. One of the resulting designs had to be used to create a pattern, and then a toile had to be made up from the pattern to show how that the design actually would work.
|
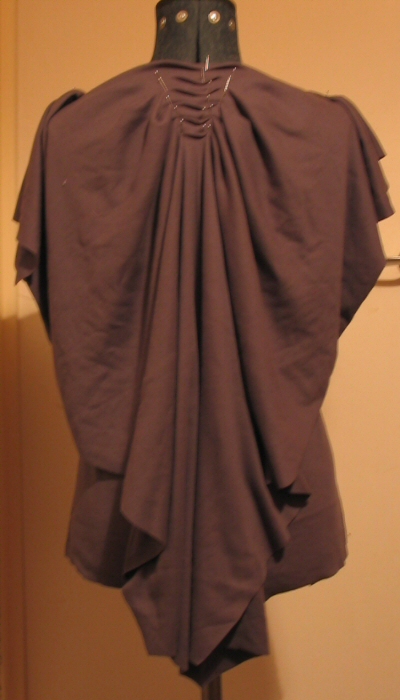 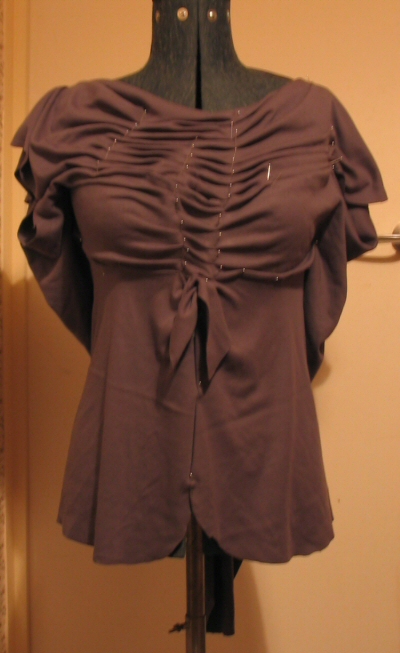 I used jersey for my second exercise. It was good to discover properties such as no unravelling. I had some off cuts of jersey from someone I know, so it was fun to develop a design with what I had, rather than starting with a rectangle. for instance, the "tail" effect at the back is free-floating, and is joined to the front seamlessly, as part of the knit tube was left intact. I kind of got carried away with all the tucks! I thread traced the folds before taking the fabric off, which took ages, but was the best way for this fabric. I am sure the pattern would be extremely complicated, so I opted NOT to do this one up! |
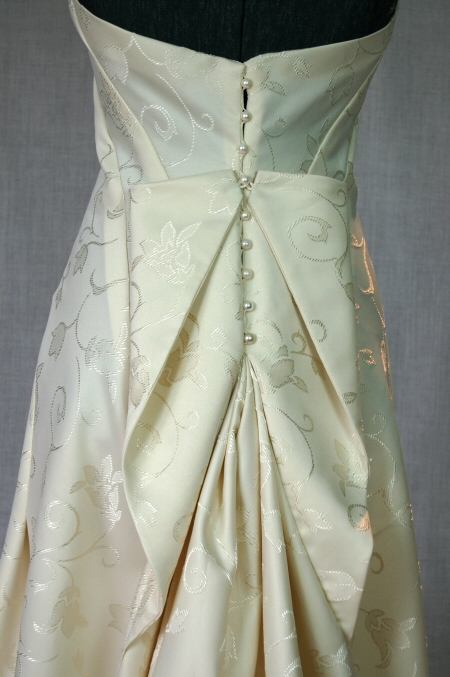
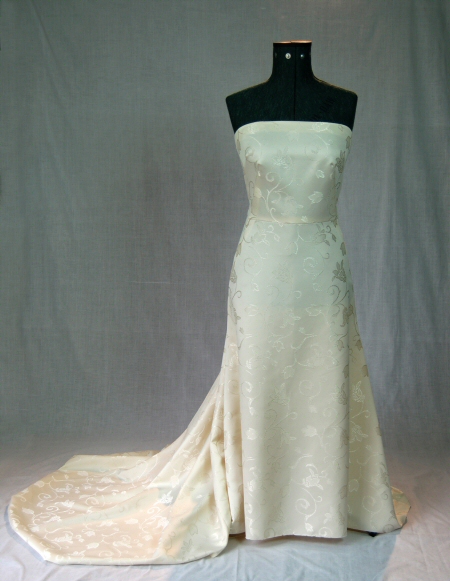
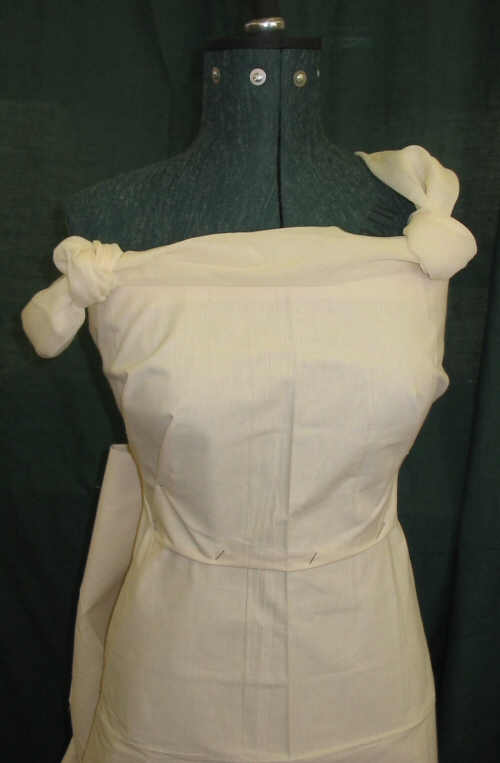 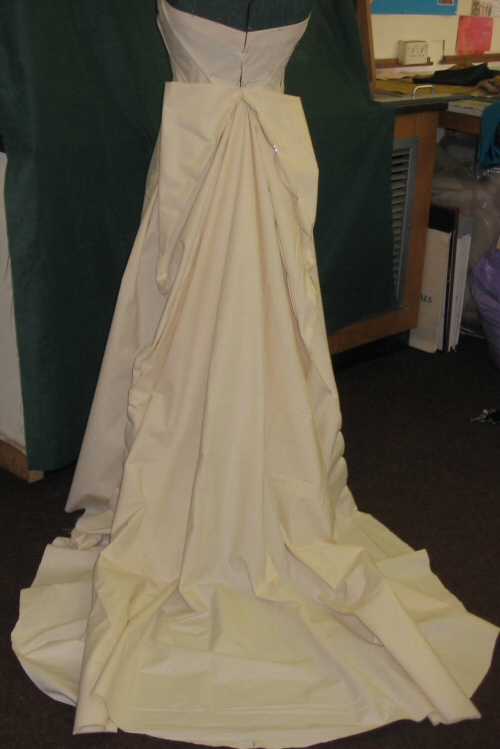 The
third exercise was done with calico. I was looking forward to working
with this, as I knew it would have a similar hand to a lot of the
fabrics I work with for historical clothing. I wanted to do something
"bridal" with a train and possibly a bow. I had a fun discovery as I did
it, finding that I could develop a "false bow" above the train. The
third exercise was done with calico. I was looking forward to working
with this, as I knew it would have a similar hand to a lot of the
fabrics I work with for historical clothing. I wanted to do something
"bridal" with a train and possibly a bow. I had a fun discovery as I did
it, finding that I could develop a "false bow" above the train.The style lines are simple, however, with curved fitting darts, you would not be able to develop it as a flat pattern. Still, it was not as difficult to trace the fold lines with a marker, and then create a pattern. I discovered several valuable things about openings and varying fabric widths as I redeveloped the original design to be worn, but was pleased that the original look was not lost. |
I have had at least 10 young ladies say they wanted this for their wedding! |
  Formal wear
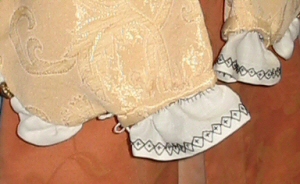
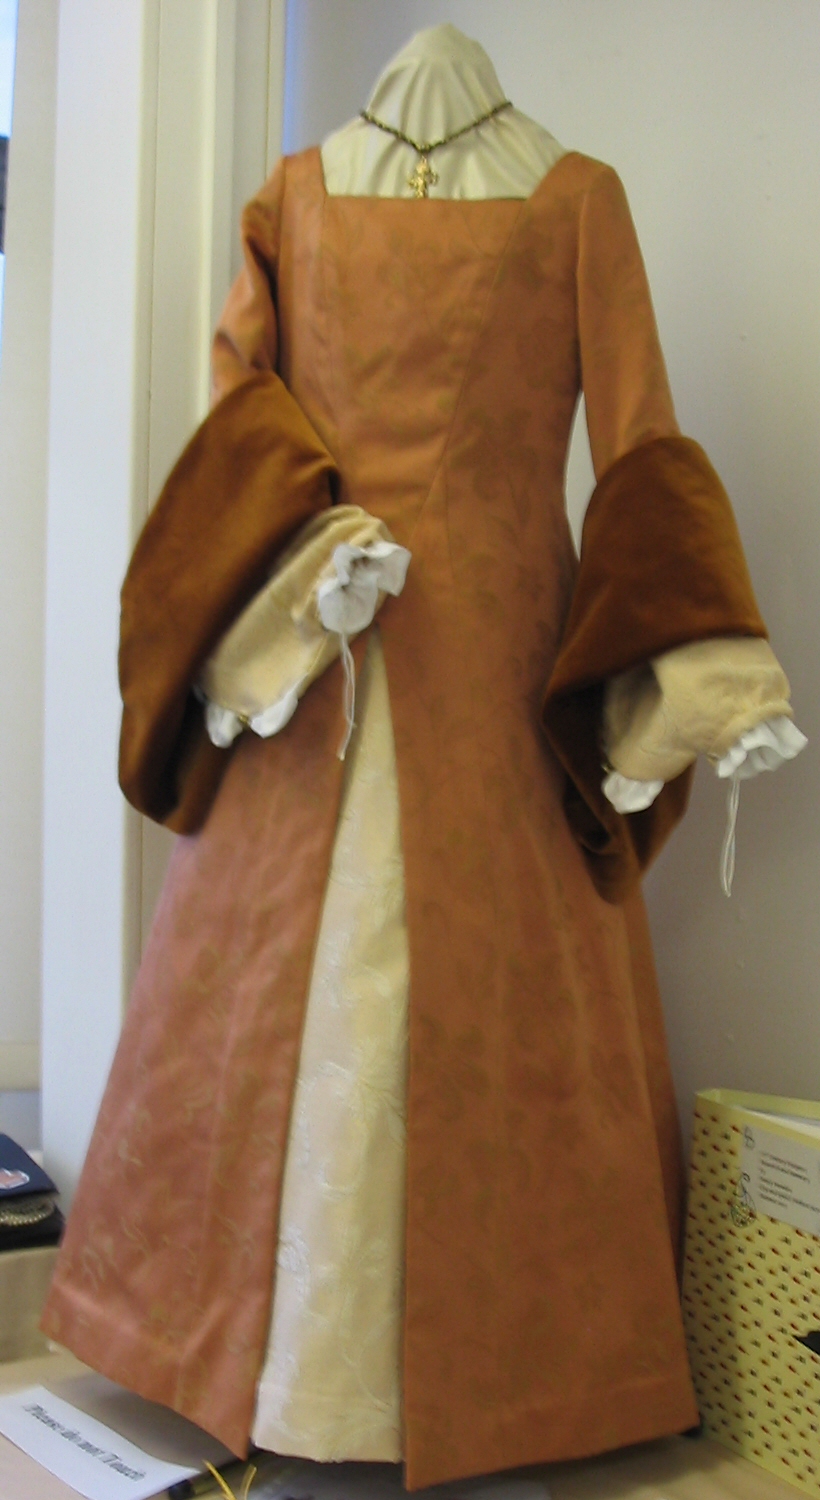
Early Tudor Gown for junior bridesmaid in Tudor themed wedding. Elizabeth I: The Young Princess From Holbein portrait of Elizabeth the
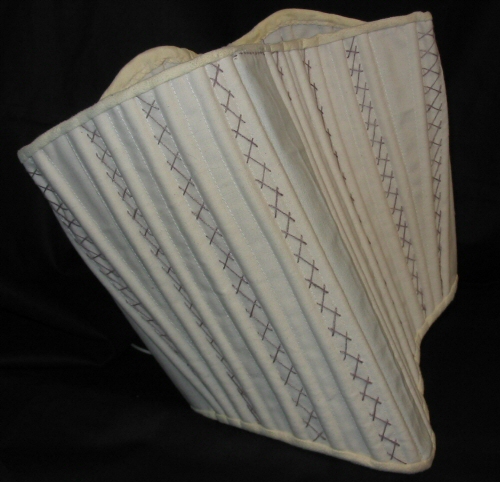
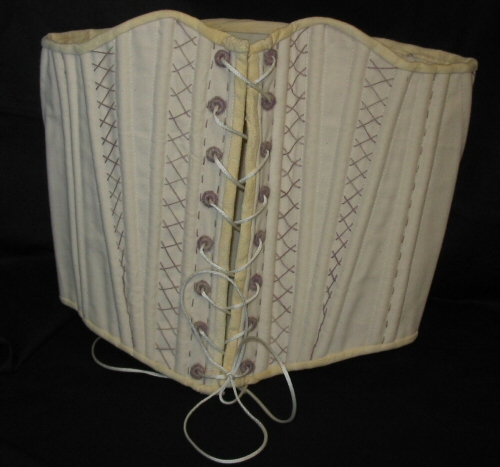
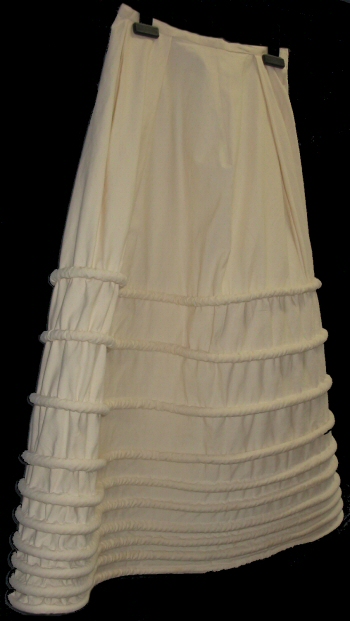
First as a young Princess. I had to develop a block to fit a child, which I then used to develop the style lines of the gown. I used some of the excellent advice and drafting instructions from Drea Leed's site Elizabethan Costuming Page, to develop the underpinnings, but as they were written for adults, there were still several things I had to change to fit a child. From the skin out, Gown consists of:
Underpinnings:
|
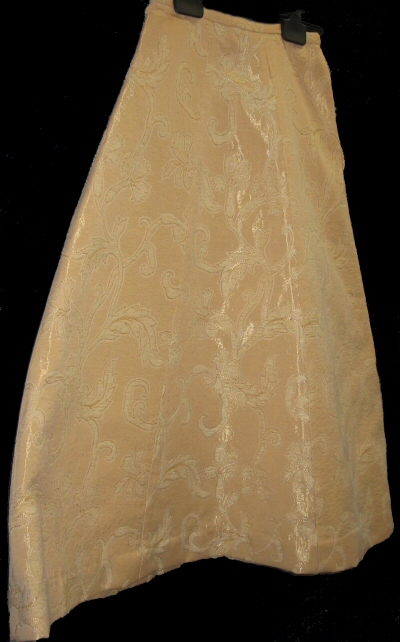 4. underskirt of upholstery weight brocade in cream with darker
glistening cream highlights and motifs of pinks (flower). 4. underskirt of upholstery weight brocade in cream with darker
glistening cream highlights and motifs of pinks (flower).
|